So, you're here because you wanna know how to access Raspberry Pi over the internet for free, right? Let's be real, the Raspberry Pi is like this little powerhouse that can do so much, but sometimes you just want to control it from afar without breaking the bank. And guess what? You totally can! This guide is gonna walk you through everything you need to know about accessing your Raspberry Pi remotely, and the best part? It’s all free! No crazy fees, no hidden costs—just pure, unadulterated remote access goodness.
Nowadays, having remote access to your Raspberry Pi isn’t just a cool trick; it’s actually super practical. Imagine being able to check on your home security system, manage your media server, or even tweak your DIY automation projects from anywhere in the world. Sounds pretty awesome, huh? But before we dive into the nitty-gritty, let’s break it down for you. Remote access doesn’t have to be complicated, and with the right tools, you can set it up in no time.
By the end of this article, you’ll not only understand how to access Raspberry Pi over the internet for free but also gain some insider tips to make sure your setup is secure and reliable. So, grab a snack, sit back, and let’s get started on this remote access journey!
- Mastering Remote Control Raspberry Pi Over Internet Your Ultimate Guide
- Maichan Erome The Rising Star In The Digital Age
What You Need to Know About Remote Access
Before we dive into the step-by-step process, let’s talk about the basics. Remote access basically means controlling your Raspberry Pi from another device, even if you’re miles apart. Think of it like giving your Pi a virtual handshake from afar. To do this, you’ll need a few key things:
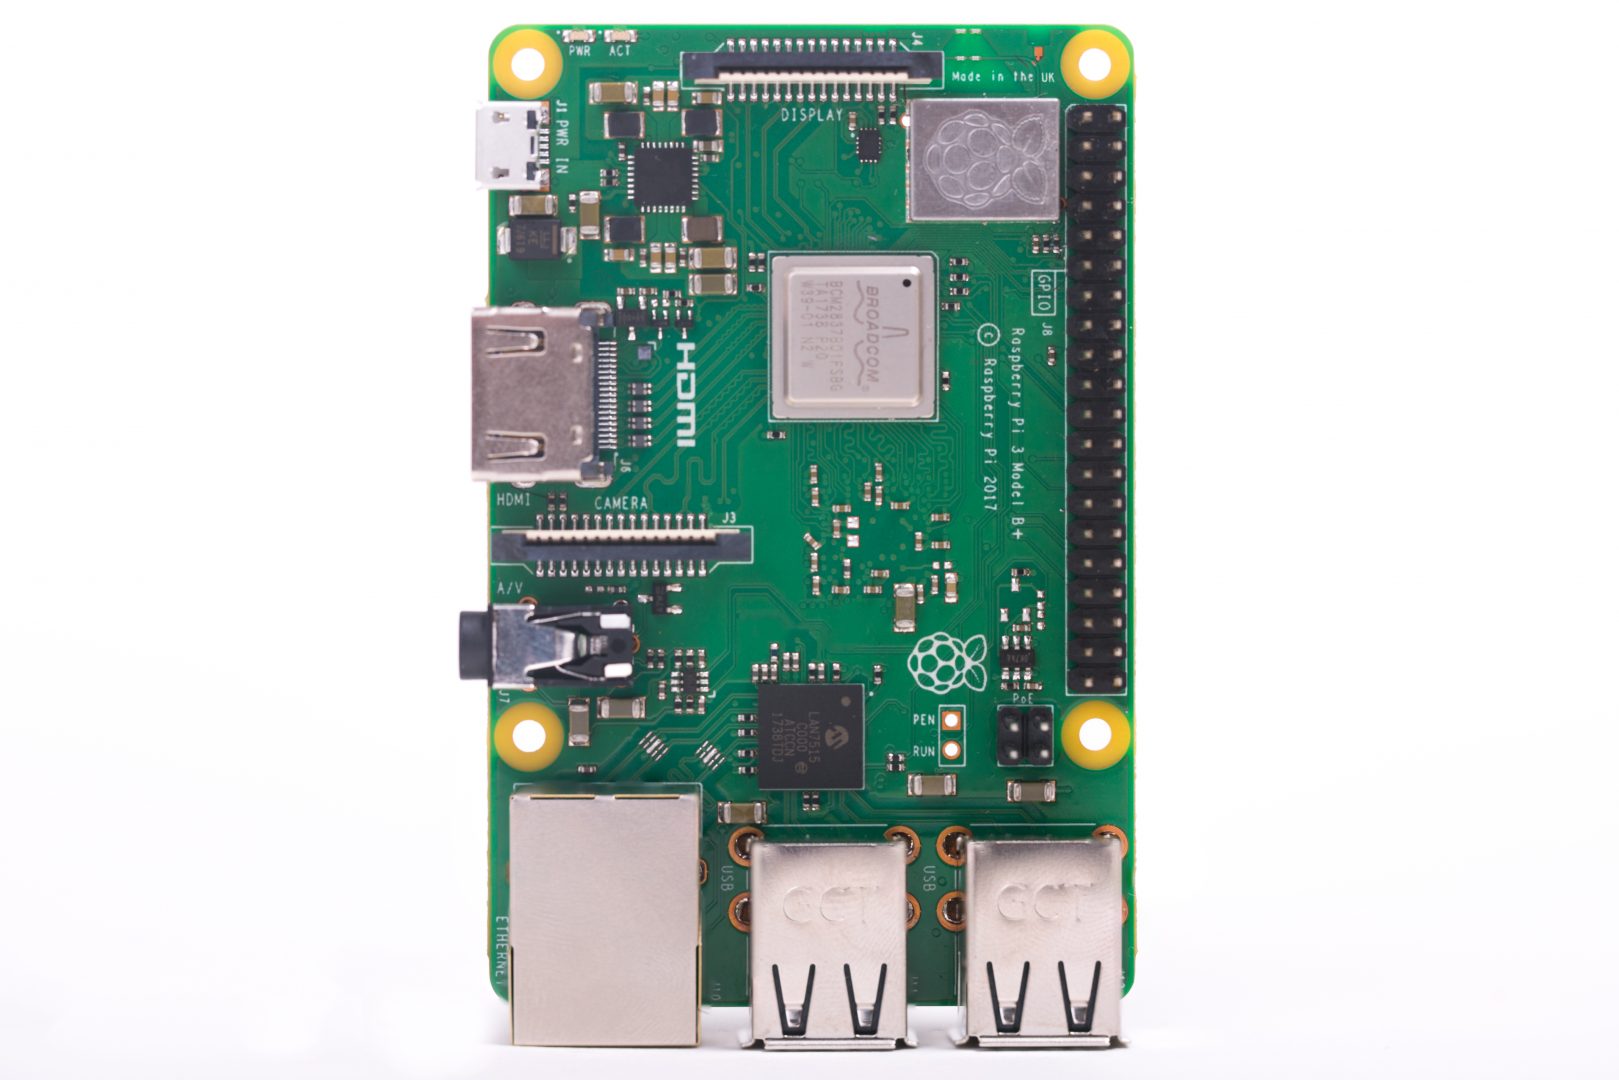
- A Raspberry Pi (duh!) with an active internet connection.
- A static IP address or dynamic DNS service to ensure your Pi stays reachable.
- A method to secure your connection, like SSH or a secure tunnel.
- A bit of patience and maybe a cup of coffee because tech stuff can get tricky sometimes.
One important thing to note is that security is a big deal when you’re accessing your Raspberry Pi over the internet. You don’t want random strangers poking around in your system, right? We’ll cover how to keep everything locked down later, but for now, just keep that in the back of your mind.
Setting Up Your Raspberry Pi for Remote Access
Step 1: Enable SSH on Your Raspberry Pi
SSH, or Secure Shell, is like the golden ticket for remote access. It lets you connect to your Raspberry Pi securely from another computer. To enable SSH, you’ll need to do a couple of things:
- Boyxxxx The Rising Star Whos Taking The World By Storm
- Monalita Xo The Rising Star Shining Bright In The Spotlight
- Boot up your Raspberry Pi and open the terminal.
- Type
sudo raspi-configand hit Enter. - Use the arrow keys to navigate to "Interfacing Options" and select it.
- Choose "SSH" and enable it.
- That’s it! SSH is now ready to roll.
Pro tip: If you’re setting up your Pi for the first time, you can enable SSH by placing an empty file named "ssh" (no extension) in the boot partition of your SD card. Easy peasy!
Understanding IP Addresses and Their Role
Static vs. Dynamic IP: Which One Should You Choose?
When it comes to remote access, your IP address is kind of a big deal. Think of it like your Pi’s address on the internet. There are two types of IP addresses you should know about:
- Static IP: This is a permanent address that doesn’t change, making it perfect for remote access. However, some ISPs charge extra for static IPs.
- Dynamic IP: This changes periodically, which can be a pain if you’re trying to connect to your Pi from afar. But don’t worry—we’ve got a solution for that!
If you’re stuck with a dynamic IP, you can use a dynamic DNS service to keep track of your changing address. Services like No-IP or DuckDNS are free and super easy to set up. Just follow their instructions, and you’ll be good to go.
Connecting to Your Raspberry Pi via SSH
Using PuTTY or Terminal for SSH
Now that SSH is enabled and your IP is sorted, it’s time to connect. If you’re on Windows, you’ll need a tool like PuTTY. On macOS or Linux, you can use the built-in terminal. Here’s how:
- Open PuTTY or your terminal app.
- Enter your Raspberry Pi’s IP address in the Host Name field.
- Set the port to 22 (that’s the default SSH port).
- Click "Open" or hit Enter to connect.
- When prompted, enter your Pi’s username (usually "pi") and password.
Boom! You’re now connected to your Raspberry Pi remotely. Congrats, you just leveled up your tech skills!
Securing Your Remote Connection
Why Security Matters
Alright, let’s talk about security for a sec. When you expose your Raspberry Pi to the internet, you’re opening it up to potential threats. Hackers love unsecured systems, so you need to take some precautions:
- Change the default password for your Pi. Don’t use something obvious like "password123".
- Consider using a non-standard SSH port instead of the default 22. This makes it harder for bots to find your Pi.
- Enable a firewall to block unwanted traffic.
- Use public key authentication instead of passwords for SSH. It’s more secure and eliminates the need to type in a password every time.
These steps might seem like overkill, but trust me, they’re worth it. Security is like insurance for your Pi—better safe than sorry!
Alternative Methods for Remote Access
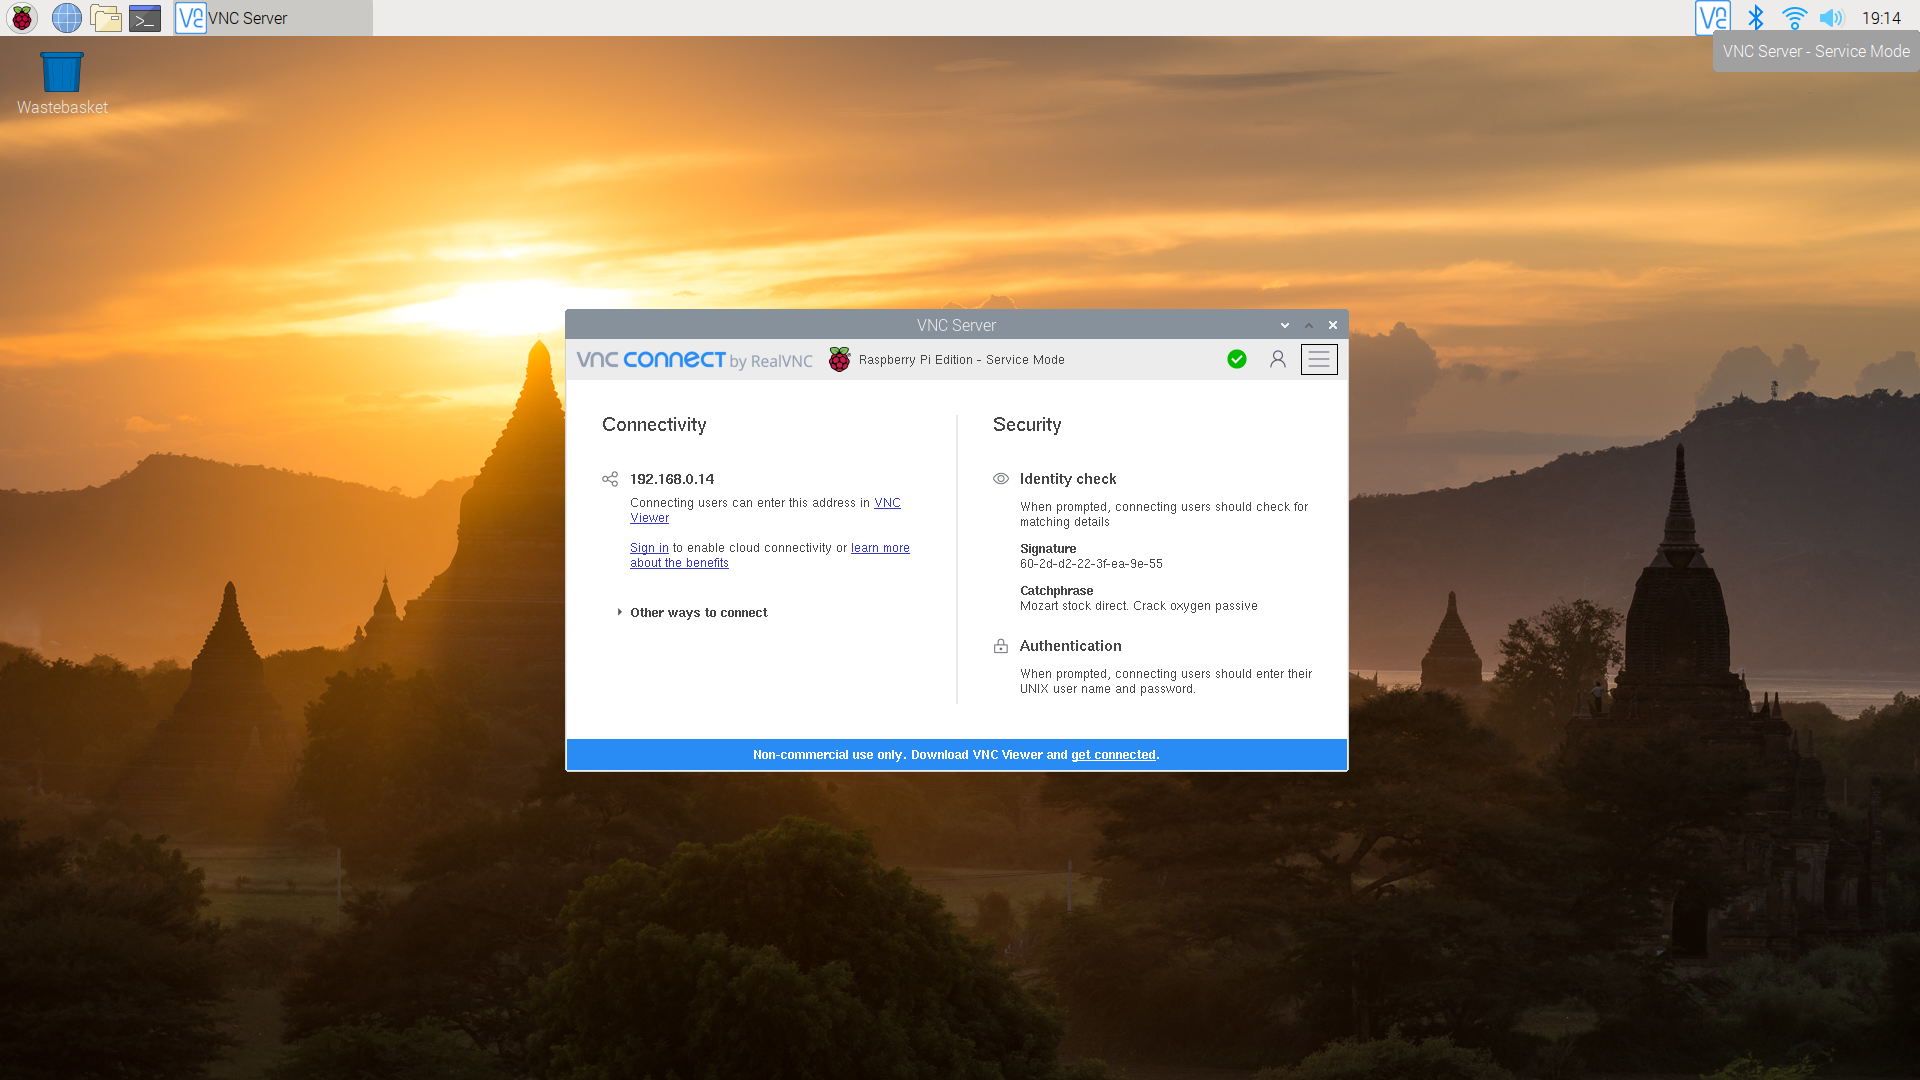
VNC: A Visual Alternative to SSH
Not a fan of command-line interfaces? No problem! You can use VNC (Virtual Network Computing) to access your Raspberry Pi’s graphical desktop remotely. Here’s how:
- Install the RealVNC server on your Raspberry Pi by running
sudo apt-get install realvnc-vnc-server. - Enable VNC in the Raspberry Pi Configuration tool.
- Download the RealVNC Viewer app on your computer or mobile device.
- Enter your Pi’s IP address and log in using your Pi’s credentials.
With VNC, you’ll see your Pi’s desktop just like you would if you were sitting right in front of it. Perfect for those who prefer a more visual approach!
Troubleshooting Common Issues
Why Can’t I Connect to My Raspberry Pi?
Remote access isn’t always smooth sailing. If you’re having trouble connecting, here are a few things to check:
- Make sure SSH or VNC is enabled on your Pi.
- Double-check your IP address and port number.
- Verify that your firewall isn’t blocking the connection.
- Ensure your router allows port forwarding for SSH or VNC.
If none of these work, try restarting your Pi or router. Sometimes, a good old-fashioned reboot can fix everything.
Advanced Tips for Power Users
Using Ngrok for Easy Access
Ngrok is a nifty little tool that creates a secure tunnel to your Raspberry Pi, allowing you to access it over the internet without messing with port forwarding. Here’s how to set it up:
- Download Ngrok from their official website and install it on your Pi.
- Run
./ngrok tcp 22to create a tunnel for SSH. - Use the public URL provided by Ngrok to connect to your Pi from anywhere.
Ngrok is great for quick and easy access, but keep in mind that it’s not as secure as a properly configured SSH setup. Use it wisely!
Conclusion: You’re Now a Remote Access Pro!
And there you have it! You now know how to access Raspberry Pi over the internet for free. From enabling SSH to securing your connection and exploring alternative methods like VNC, you’ve got all the tools you need to take control of your Pi from anywhere in the world.
But remember, with great power comes great responsibility. Always prioritize security to protect your Pi and your data. And if you run into any issues, don’t hesitate to revisit this guide or hit me up in the comments below. I’d love to hear about your Raspberry Pi adventures!
So, what are you waiting for? Go ahead and give it a try. Once you’ve got remote access down, the possibilities are endless. Happy tinkering, and stay awesome!
Table of Contents
- How to Access Raspberry Pi Over the Internet for Free: Your Ultimate Guide
- What You Need to Know About Remote Access
- Step 1: Enable SSH on Your Raspberry Pi
- Understanding IP Addresses and Their Role
- Static vs. Dynamic IP: Which One Should You Choose?
- Connecting to Your Raspberry Pi via SSH
- Using PuTTY or Terminal for SSH
- Securing Your Remote Connection
- Why Security Matters
- Alternative Methods for Remote Access
- VNC: A Visual Alternative to SSH
- Troubleshooting Common Issues
- Why Can’t I Connect to My Raspberry Pi?
- Advanced Tips for Power Users
- Using Ngrok for Easy Access
- Conclusion: You’re Now a Remote Access Pro!

Detail Author:
- Name : Moses Rosenbaum
- Username : stroman.chesley
- Email : marilou.rath@yahoo.com
- Birthdate : 2006-11-25
- Address : 4416 Meredith Plain Naderfort, RI 87978-7648
- Phone : +1-865-589-0985
- Company : Mohr-Collier
- Job : Production Planner
- Bio : Similique saepe autem aliquid assumenda ut qui. Consequatur eum quis maiores exercitationem enim. Aut harum impedit ut.
Socials
instagram:
- url : https://instagram.com/christian_official
- username : christian_official
- bio : Quisquam nulla aut repellat ullam ratione quas vel. Veniam quis sed sed aut fuga.
- followers : 4525
- following : 1003
facebook:
- url : https://facebook.com/christian_dev
- username : christian_dev
- bio : Quod totam enim aliquid ratione qui.
- followers : 3154
- following : 747
